brawl2.jpg


Just as I promised All The Info Will Be After The Jump


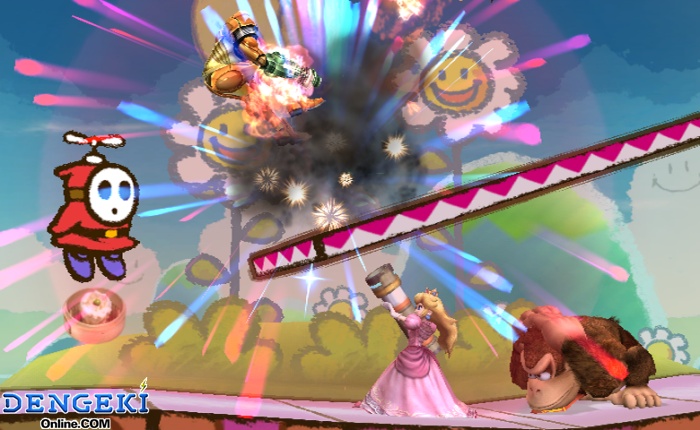
  • Final Destination is now 100% completely confirmed.
  • The ordering for character weight that was shown a few days ago lists the percentages that it takes to KO that character with Mario’s Side Smash from the center of Final Destination.
  • The best three attacks listed for each character tell which attacks have the most knockback, and what percentage they can KO Mario from the center of Final Destination.
  • Wall Clinging is confirmed.
  • All of the smashes listed are uncharged.
  • Mario can be KO’d at 17% by a fully charged side smash from King Dedede. So from the characters we know, Dedede’s fully charged Side Smash is the most powerful move in the game.
  • The Pokemon Trainer’s pokemon all get fatigued at about 2 minutes, even if you dont move them. They all show visible signs of fatigue: Charizard lowers his head and wings. Squirtle drops his front hands to the ground. Ivysaur’s bulb withers.
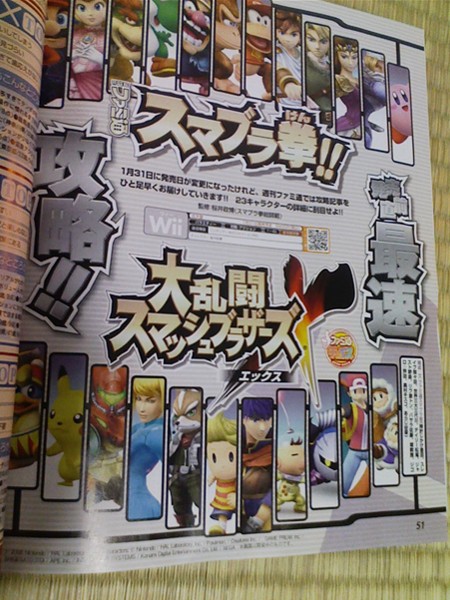
  • The Fanmitsu magazine confirms the starting roster is the 23 characters on the Dojo. (minus Snake and Sonic, and including Zero Suit Samus and Sheik)
  • Once fatigued, a Pokemon becomes much slower.
  • If you do an aerial dodoge the precise moment before you are hit by an opponent, it will reverse the attack.
  • The game allows you to access the rules menu directly from the character select screen.
  • When Sheik attacks with certain items such as the Star Rod and Beam Sword, she swings upward twice with a single motion.
  • The damage percentages were determined in training mode against a dummy CP and do not take DI in to account.
  • Wario’s bite can swallow and destroy items and projectiles thrown at him. Everytime he does this, he takes 6% damage.
  • The magazine makes no mention of being able to start as Zero Suit Samus at the start of a match.Here is the Character Info:Mario
  • Number of jumps: 2
  • Wall Hop: Yes
  • Wall Cling: No
  • Gliding: No
  • Crawling: No
  • Weight: Normal
  • Speed: Normal
    Best 3
  • Side Smash A: 103%
  • Up Smash A: 124%
  • Down Smash A: 136Peach
  • Number of jumps: 2
  • Wall Hop: No
  • Wall Cling: No
  • Gliding: No
  • Crawling: No
  • Weight: Light
  • Speed: Slow
    Best 3
  • Up Smash A: 80%
  • Aerial Forward A: 124%
  • Side Smash A: 135%Bowser
  • Number of jumps: 2
  • Wall Hop: No
  • Wall Cling: No
  • Gliding: No
  • Crawling: Yes
  • Weight: Heavy
  • Speed: Slow
    Best 3
  • Side Smash A: 80%
  • Aerial Up A: 87%
  • Down B: 94%Yoshi
  • Number of jumps: 2
  • Wall Hop: No
  • Wall Cling: No
  • Gliding: No
  • Crawling: Yes
  • Weight: Normal
  • Speed: Normal
    Best 3
  • Side Smash A: 112%
  • Aerial Up A: 123%
  • Down B: 123%Wario
  • Number of jumps: 2
  • Wall Hop: Yes
  • Wall Cling: No
  • Gliding: No
  • Crawling: Yes
  • Weight: Heavy
  • Speed: Normal
    Best 3
  • Side Smash A:105%
  • Aerial Up A: 120%
  • Side A: 128%Pit
  • Number of jumps: 4
  • Wall Hop: No
  • Wall Cling: No
  • Gliding: Yes
  • Crawling: No
  • Weight: Normal
  • Speed: Normal
    Best 3
  • Aerial Back A: 100%
  • Side Smash A: 121%
  • Down Smash A: 133%DK
  • Number of jumps: 2
  • Wall Hop: Yes
  • Wall Cling: No
  • Gliding: No
  • Crawling: No
  • Weight: Heavy
  • Speed: Normal
    Best 3
  • Smash Side A: 75%
  • Up Smash A: 79%
  • Smash Down A: 92%Diddy Kong
  • Number of jumps: 2
  • Wall Hop: Yes
  • Wall Cling: Yes
  • Gliding: No
  • Crawling: Yes
  • Weight: Normal
  • Speed: Fast
    Best 3
  • Side Smash A: 127%
  • Down Smash A: 129%
  • Aerial Forward A: 142%Samus
  • Number of jumps: 2
  • Wall Hop: Yes
  • Wall Cling: No
  • Gliding: No
  • Crawling: No
  • Weight: Heavy
  • Speed: Normal
    Best 3
  • Aerial Back A: 115%
  • Side Smash A: 126%
  • Down A: 131%Zero Suit Samus
  • Number of jumps: 2
  • Wall Hop: Yes
  • Wall Cling: No
  • Gliding: No
  • Crawling: Yes
  • Weight: Light
  • Speed: Fast
    Best 3
  • Side B: 111%
  • Down B: 112%
  • Aerial Back A: 115%Fox
  • Number of jumps: 2
  • Wall Hop: Yes
  • Wall Cling: No
  • Gliding: No
  • Crawling: No
  • Weight: Light
  • Speed: Fast
    Best 3
  • Up Smash A: 93%
  • Side Smash A: 123%
  • Aerial Back A: 125%Link
  • Number of jumps: 2
  • Wall Hop: No
  • Wall Cling: No
  • Gliding: No
  • Crawling: No
  • Weight: Heavy
  • Speed: Slow
    Best 3
  • Aerial Down A: 84%
  • Down Smash A: 107%
  • Side Smash A: 119%Zelda
  • Number of jumps: 2
  • Wall Hop: No
  • Wall Cling: No
  • Gliding: No
  • Crawling: No
  • Weight: Light
  • Speed: Normal
    Best 3
  • Arial Forward or Back A: 67% (WTF!!)
  • Aerial Up A: 81%
  • Side A: 104%Shiek
  • Number of jumps: 2
  • Wall Hop: Yes
  • Wall Cling: Yes
  • Gliding: No
  • Crawling: Yes
  • Weight: Light
  • Speed: Fast
    Best 3
  • Up Smash A: 89%
  • Up B: 132%
  • Side Smash A: 142%Kirby
  • Number of jumps: 5
  • Wall Hop: No
  • Wall Cling: No
  • Gliding: No
  • Crawling: No
  • Weight: Normal
  • Speed: Normal
    Best 3
  • Side B: 83%
  • Side Smash A: 97%
  • Down B: 100%Metaknight
  • Number of jumps: 5
  • Wall Hop: No
  • Wall Cling: No
  • Gliding: Yes
  • Crawling: No
  • Weight: Light
  • Speed: Fast
    Best 3
  • Side Smash A: 111%
  • Down Smash A: 112%
  • Up A: 130%King Dedede
  • Number of jumps: 4
  • Wall Hop: No
  • Wall Cling: No
  • Gliding: No
  • Crawling: No
  • Weight: Heavy
  • Speed: Slow
    Best 3
  • Side Smash A: 44% (Uff!!)
  • Up A: 103%
  • Up B: 104%Lucas
  • Number of jumps: 2
  • Wall Hop: No
  • Wall Cling: No
  • Gliding: No
  • Crawling: No
  • Weight: Normal
  • Speed: Normal
    Best 3
  • Up Smash A: 75%
  • Side Smash A: 88%
  • Down Smash A: 90%Ike
  • Number of jumps: 2
  • Wall Hop: No
  • Wall Cling: No
  • Gliding: No
  • Crawling: No
  • Weight: Heavy
  • Speed: Slow
    Best 3
  • Side Smash A: 48%
  • Down A: 86%
  • Side A: 93%Pikachu
  • Number of jumps: 2
  • Wall Hop: No
  • Wall Cling: No
  • Gliding: No
  • Crawling: Yes
  • Weight: Light
  • Speed: Fast
    Best 3
  • Down B: 76%
  • Side Smash A: 105%
  • Up Smash A: 115%Ice Climbers
  • Number of jumps: 2
  • Wall Hop: No
  • Wall Cling: No
  • Gliding: No
  • Crawling: No
  • Weight: Normal
  • Speed: Normal
    Best 3
  • Side Smash A: 110%
  • Up Smash A: 113%
  • Aerial Forward A: 129%Olimar
  • Number of jumps: 2
  • Wall Hop: No
  • Wall Cling: No
  • Gliding: No
  • Crawling: No
  • Weight: Normal
  • Speed: Normal
    Best 3
  • Up Smash A: 79% (varies depending on Pikmin)
  • Down Smash A: 92% (varies depending on Pikmin)
  • Side Smash A: 100% (varies depending on Pikmin)Squirtle
  • Number of jumps: 2
  • Wall Hop: No
  • Wall Cling: Yes
  • Gliding: No
  • Crawling: Yes
  • Weight: Light
  • Speed: Fast
    Best 3
  • Up Smash A: 93%
  • Side Smash A: 119%
  • Down Smash A: 136%Ivysuar
  • Number of jumps: 2
  • Wall Hop: No
  • Wall Cling: No
  • Gliding: No
  • Crawling: Yes
  • Weight: Normal
  • Speed: Normal
    Best 3
  • Up Smash A: 59% (Ouch!!)
  • Aerial Up A: 96%
  • Side Smash A: 102%Charizard
  • Number of jumps: 3
  • Wall Hop: No
  • Wall Cling: No
  • Gliding: Yes
  • Crawling: No
  • Weight: Heavy
  • Speed: Slow
    Best 3
  • Side Smash A: 83%
  • Side B: 98%
  • Up B: 101%
  • Link